You’ve set up your AdWords account, did all your keyword research, and wrote the perfect ads, so you’re all ready to go right? Well not just yet, you still have one more step before activating those campaigns. All that work will be for nothing if you aren’t able to see how many purchases are made as a result of your ads; this is where conversion tracking comes in. Properly setting up conversion tracking is an important step to accurately tracking the performance of your AdWords campaigns. There are a few different types of actions that you can track in AdWords, but today we’ll go over how you can set up tracking for purchases made on your website. The New AdWords Experience was made available to all advertisers last month and it brought a new way of tracking conversions with it. Haven’t started using the new interface yet? Now’s the time to make the switch; follow our guide and you’ll be tracking in no time! Now let’s get tracking:
Step 1
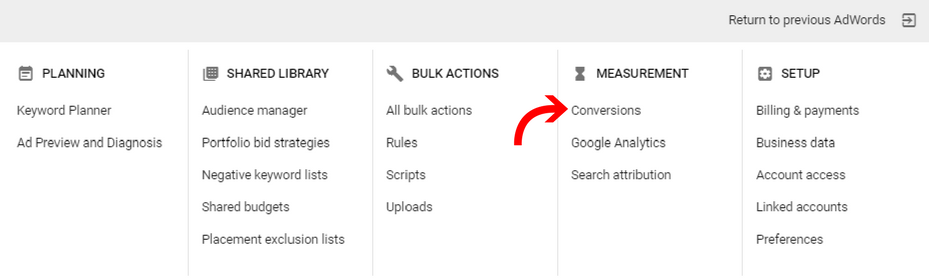
First, you’ll need to log in to your AdWords account, click on the wrench icon in the upper right-hand corner and click on ‘Conversions’ under ‘Measurement’.
Step 2
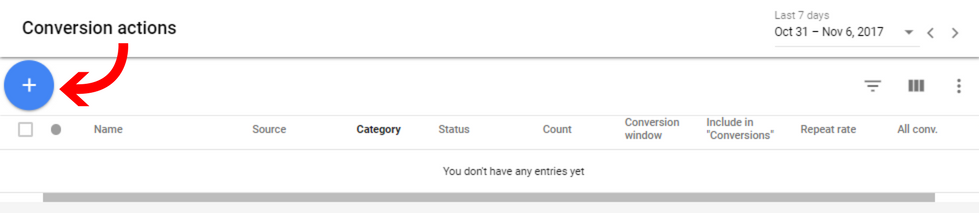
Next, click the plus to add a conversion action.
Step 3
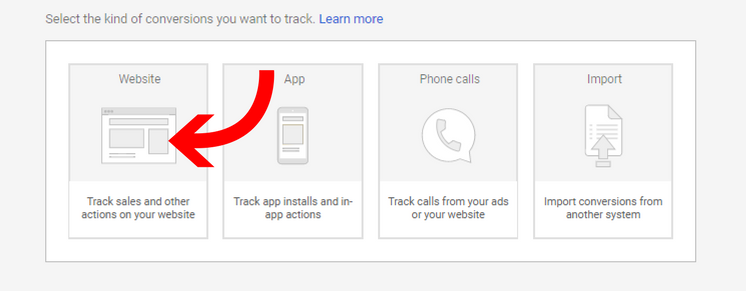
Choose ‘Website’ since we’re tracking purchases made from your site.
Step 4
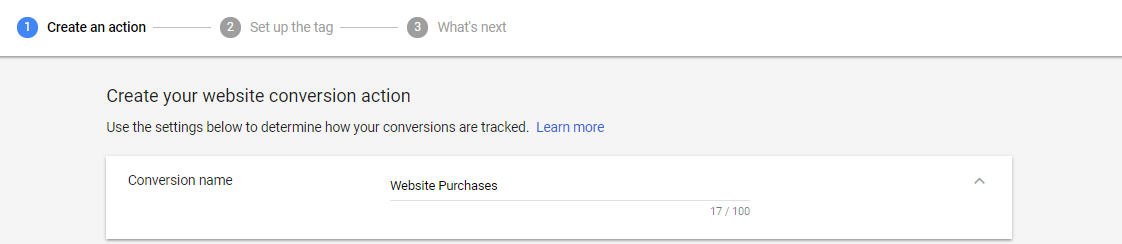
When you get to the ‘Create an action’ page you’ll first need to enter a name for your conversion. If you are planning on adding more than one type of conversion, you may want to name it something specific such as ‘Website Purchases’.
Step 5
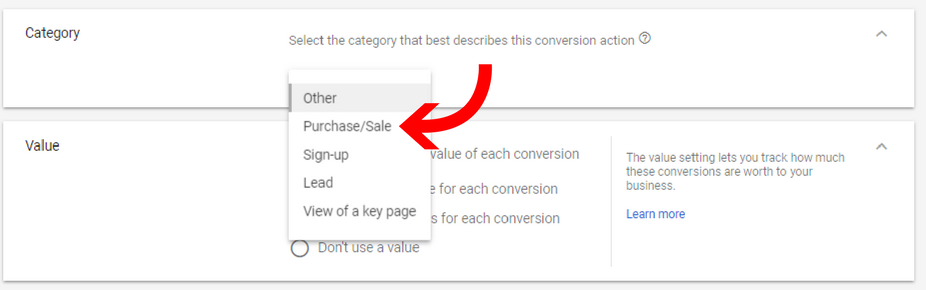
Select ‘Purchase/Sale’ from the drop-down.
Step 6
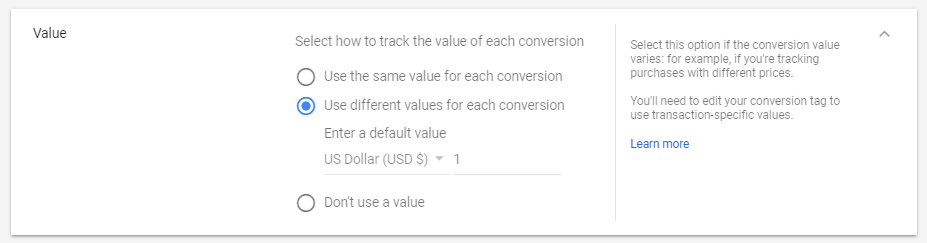
For this section, you’ll want to select the first option only if all of the products/services for sale on your site have the same value. If you sell products at a variety of prices, you should select ‘Use different values for each conversion’; if you choose this option, you’ll also have to enter a default value above $0.
Step 7
Set the ‘Count’ to ‘Every’ if you want to count each conversion that comes from a click on one of your ads. If you choose ‘One’ here someone who clicks on your ad and makes 3 purchases will only be counted as one conversion.

Step 8
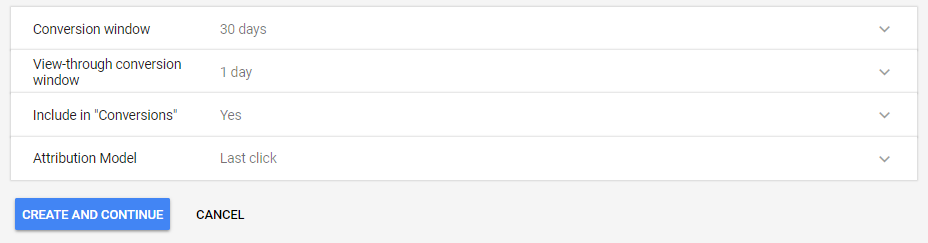
In this section you’ll be able to set the following:
- Conversion window – how long you want to track conversions after a user clicks on your ad. For example if you choose 30 days, AdWords will count any purchase made by a user within 30 days after he or she clicked on your ad as a conversion.
- View-through conversion window – how long you want to track conversions from users who saw your ad (but didn’t click on it) and made a purchase.
- Include in “Conversions” – set this as ‘Yes’ when you want the conversion action to be included in the “Conversions” section of your AdWords account.
- Attribution Model – how you want to assign credit to your ad clicks that lead to conversion. You can find more information on attribution modelling here.
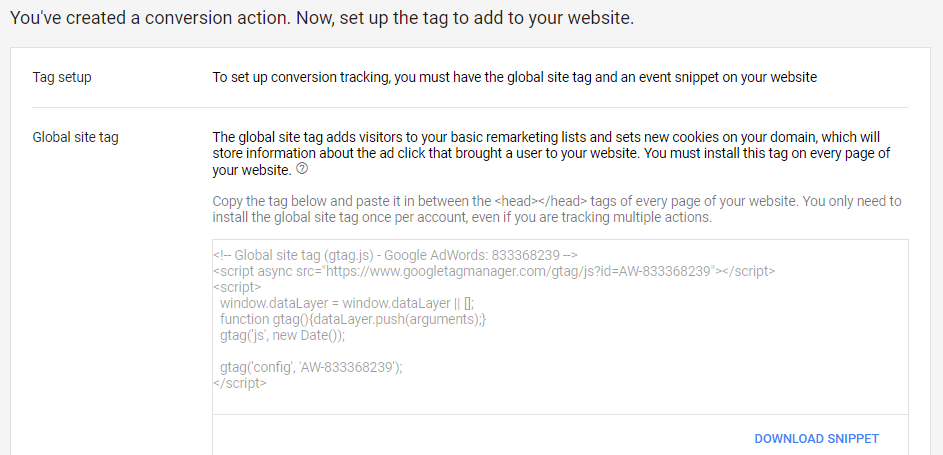
Adding the Tag to Your Website
The first tag you’ll be given is your global site tag. You’ll need to paste this code between the <head></head> tags on every page of your website. I know this sounds like a lot of work, but the good news is you’ll only have to do this step once no matter how many conversions actions you want to track in your account!
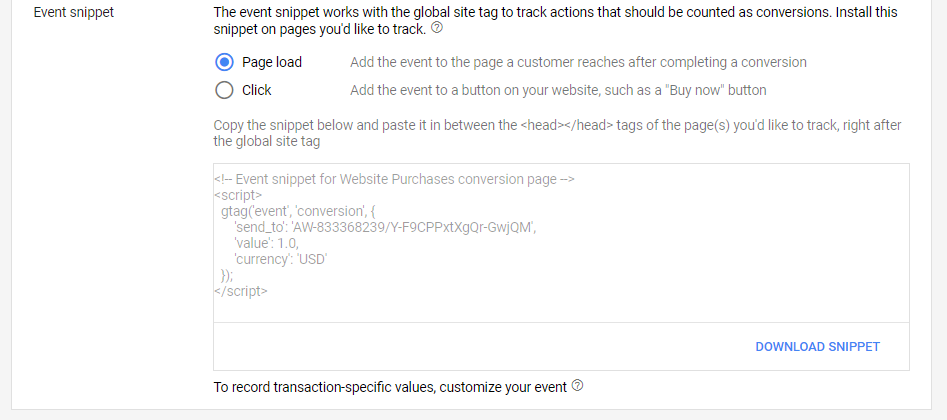
In addition to this, you’ll also be given an event snippet tag. This should be pasted between the <head></head> tags on only the page a user sees after making a purchase (ex: a ‘Thank You’ page). This tag cannot be directly copy and pasted to your site, you’ll first need to edit the code to include variables to dynamically track values of conversions. This dynamic variable will be based on you ecommerce platform; check out the links below for some of the top platforms:
For other platforms, head over to this AdWords Help center page for more detailed instructions on how to alter the code to track conversion-specific values.
So now that you’ve set up conversion tracking, you’re all set to start running your ads!
Have any questions about conversion tracking? Leave them in the comments below!