In our last post we showed you how to set up your first feed in Google Merchant Center; now it’s time to create your first Shopping campaign!
Structuring Your Campaign
A proper campaign setup is crucial to your success on Google Shopping. You have a few options when it comes to setting up your Shopping campaigns. The easiest option is to create a single campaign and ad group which includes all of your products. This is the best method if you don’t have a lot of products. The downside to this method is that you don’t have much control over how your budget is allocated.
Your other option is to break your shopping campaign up into different campaigns and ad groups. This method is a bit more time consuming to set up, but it allows you to more easily view performance and gives more control over budgets and targeting. Let’s say you sell three different types of women’s shoes: sneakers, boots and heels. If you segment these three categories into different ad groups, you have the opportunity to add different negative keywords to each category to make sure you’re targeting the right searchers. For example, you can add ‘boots’ and ‘heels’ as negative keywords for your sneakers ad group to make sure that someone looking for women’s boots isn’t served an ad for your boots.
Once you decide how to structure your campaign, it’s time to set it up!
Setting Up Your First Campaign
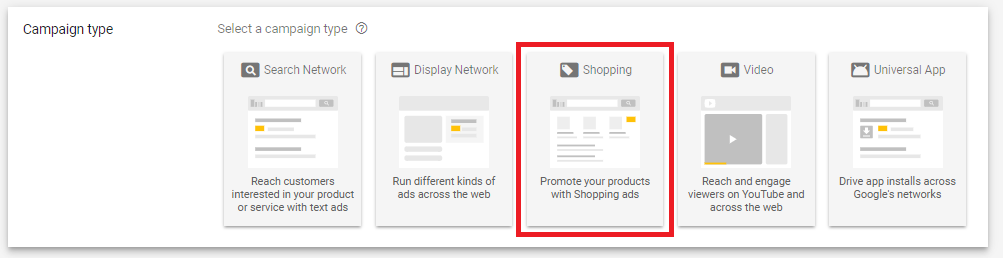
Create a New Campaign
Log into your AdWords account and go to the ‘Campaigns’ tab. Click the blue plus sign to create a new campaign and select shopping.
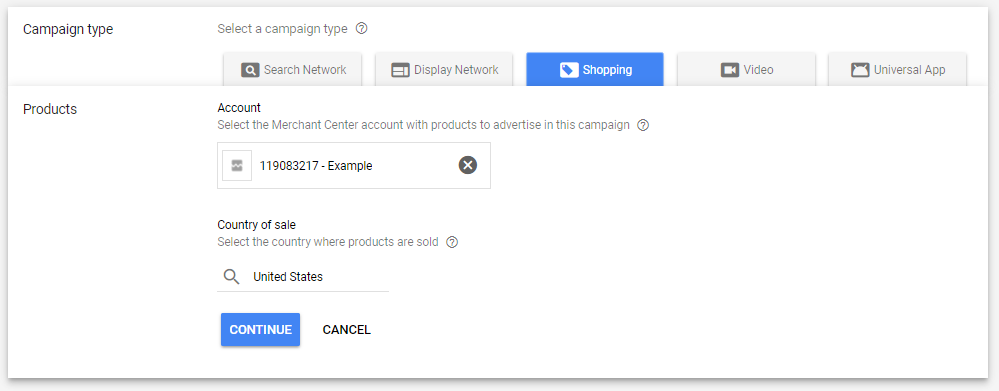
Select Your Merchant Center Account
Select your Merchant Center account with the feed that you want to advertise. Here you can also set the country you want to advertise in.
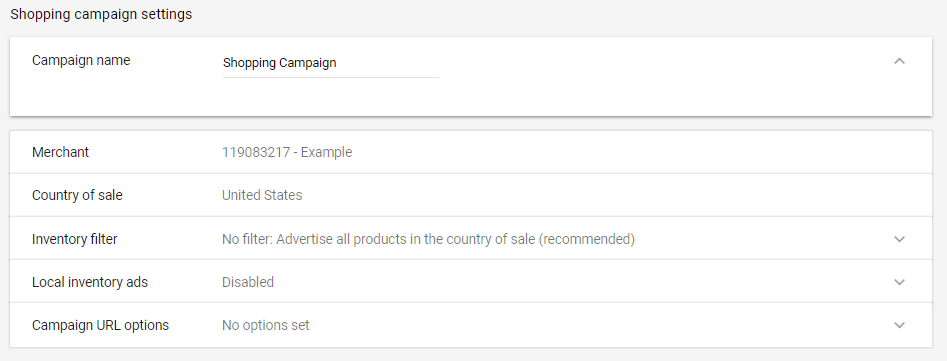
Campaign Settings
First, you’ll need to name your campaign. In this section you’ll also be able to set inventory filters. If you don’t want to advertise all of your products, you can set a filter that narrows down the selection to only products that match your requirements. Local inventory ads can be enabled to promote products sold in physical stores. The campaign URL options allow you to have users pass through a tracking URL before arriving at your final URL.
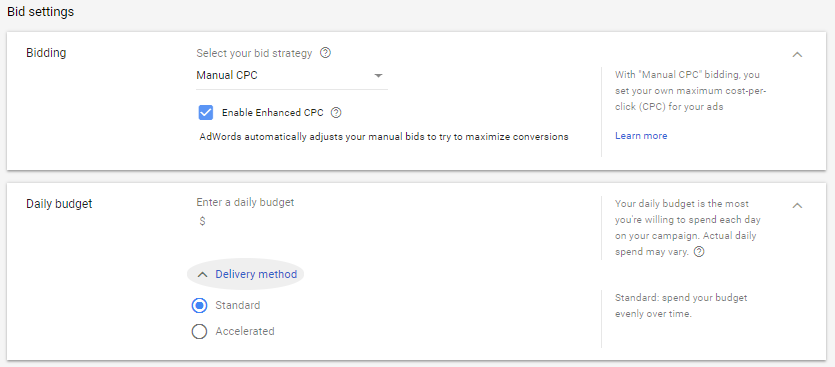
Enter your Bid Settings
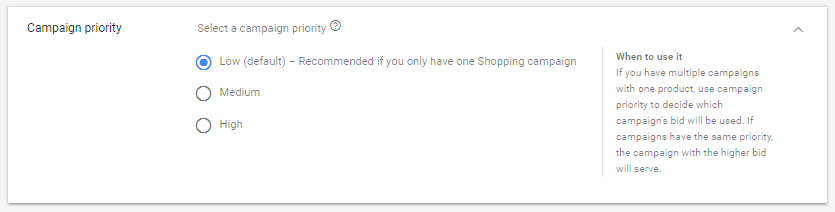
Next, you’ll be asked to edit your bid settings. When selecting your bid strategy, you’ll have the option to set your bids manually or choose an automated strategy that will set bids to either maximize clicks or conversions within your budget. You’ll also be asked to set your daily budget and how you want the budget to be delivered. A standard delivery method will spend your budget evenly over time while an accelerated method will spend your budget more quickly. You’ll also need to set the campaign priority if you have more than one of your campaigns is advertising the same product. If all the campaigns have the same priority, the one with the higher bid will be shown.
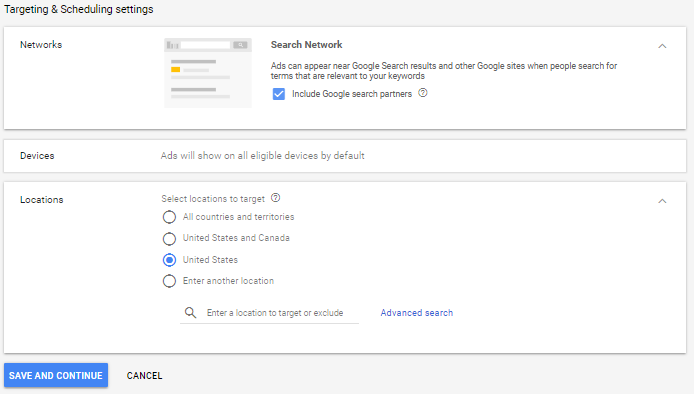
Enter Targeting & Scheduling
Next, you’ll be able to set the networks, devices and locations that you want your ads to appear.
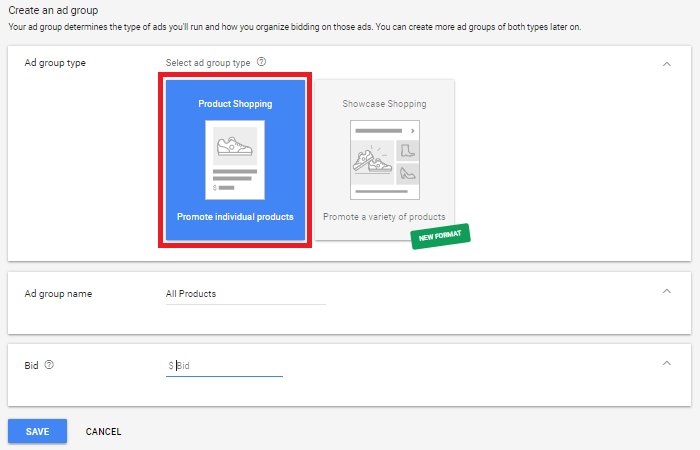
Create Ad Groups
Now it’s time to create your ad groups. You have the option to create an ad group for individual product or you can create a new Showcase Shopping ad. Next, you’ll need to name your ad group, if you are not choosing to filter your products you can just create one ad group for all of your products. You’ll also need to set your max CPC bid here.
Once you make your way through all the steps, hit save and you’re done. Congrats on successfully uploading your first Shopping campaign!
Don’t miss out on any of our posts, subscribe to the blog today!
Google Shopping Series: