Last week I went over why you should set up a Shopping campaign for your e-commerce business. Our next few posts will show you how to set up your first campaign. Today we’ll go through the process of creating and uploading a product feed to Google Merchant Center; this method is best if you don’t have a ton of products. If you do have a lot of products, it may make more sense to use an app or service that’ll do this work for you. Now let’s set up a feed!
Determine Attributes

There are a few ways to set up your product feed, but today I’ll be showing you how to do it in Google Sheets. First, you’ll need to determine which attributes you want to include in your feed. You’ll need to then enter the attributes you choose as column titles in your first row. Below is our recommended setup – all required fields are highlighted in orange. Specific industries also have additional requirements; for example, the apparel industry requires you to name the color, size and gender of your products.
- item_group_id – use this when product differs by more than one of these attributes: color, size, pattern, material, age group, gender
- id – Unique product ID, use your SKU if possible
- title – This should match title from your landing page. Make sure to add any specifics such as size or color that consumers may search for
- description – include additional information about the product – don’t include general store information or sales here
- link – link to your product page beginning with http(s)
- image_link – link to the unedited main image of your product
- availability – choose from “in stock”, “out of stock” and “preorder”
- condition – choose from “new”, “refurbished” or “used”
- brand – provide your product’s brand name; if you produce the item or the brand is generic, leave this field blank
- mpn – if your product doesn’t have a GTIN, you’ll need to include a Manufacturer Part Number
- gtin – the Global Trade Item Number found on the product’s barcode
- identifier_exists – if your product doesn’t have a GTIN or MPN, you can input a product identifier that was assigned by the manufacturer
- color – required for apparel; include the color of the product
- gender – required for apparel; can choose from “male”, “female” and “unisex”
- size – required for apparel
- google_product_category – required for apparel & accessories, media, and software categories. More information on product categories can be found here.
- product_type – specific category that your product falls into. For example, the Google category might be “Shoes” but you can set a sub-category of “High Heels”.
- price – price and currency of your product that matches the price on your landing page
- sale_price – product’s sale price
- shipping_weight – the weight of the product used to calculate the shipping cost
A full list of attributes can be found here.
Input Product Info
Now it’s time for the real work to begin; once your headers are in place you can begin adding your products to the spreadsheet. Each product’s information should be placed in a separate row; if a product doesn’t have information for a certain attribute, leave the cell blank.
Upload your feed
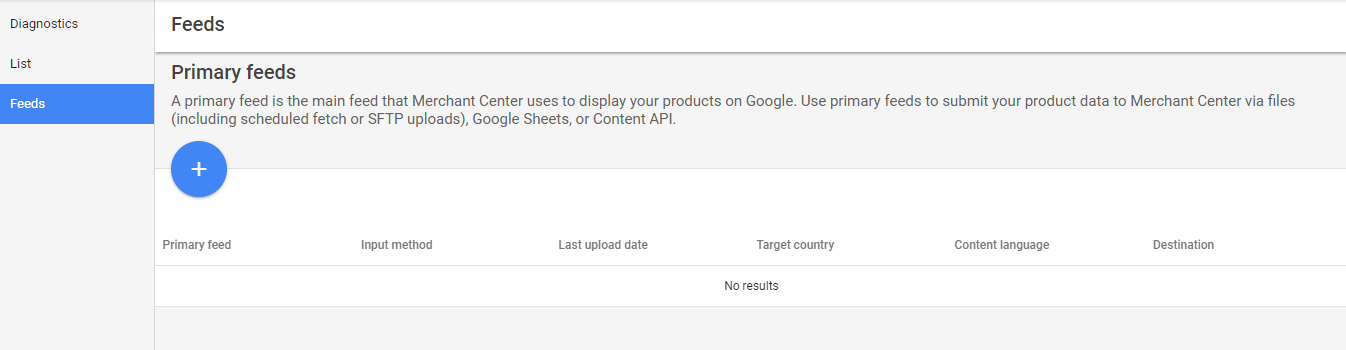
Log into your Google Merchant Center account and click “Products” from the left navigation. Then go to the “Feeds” tab and click on the blue plus under “Primary feeds”.
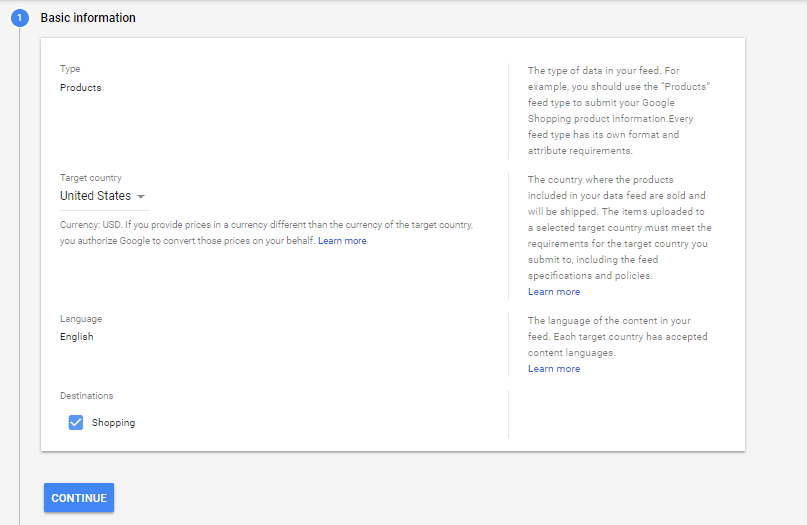
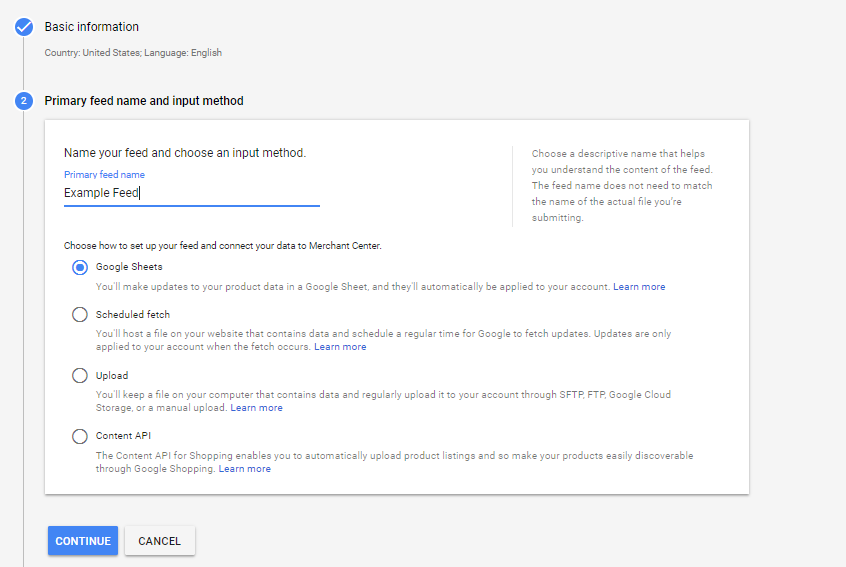
Next, fill out some basic information. You’ll need to set the type as “Products”, then set your desired target country and language. Make sure your destination here is set as “Shopping”.
Now you’ll have to name your feed and choose your upload method. I created my example feed on Google Sheets.
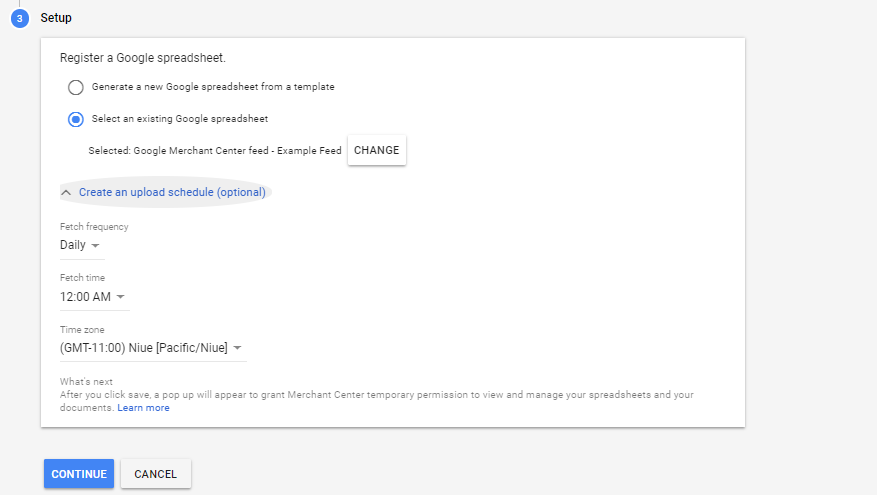
If you’re using Google Sheets, you can either generate a new spreadsheet or choose an existing sheet. Once you choose the sheet you want to upload, you’ll also be prompted to create an option upload schedule. If you update your products frequently, you may want to consider scheduling regular uploads so your feed will stay up to date.
Edit Your Settings
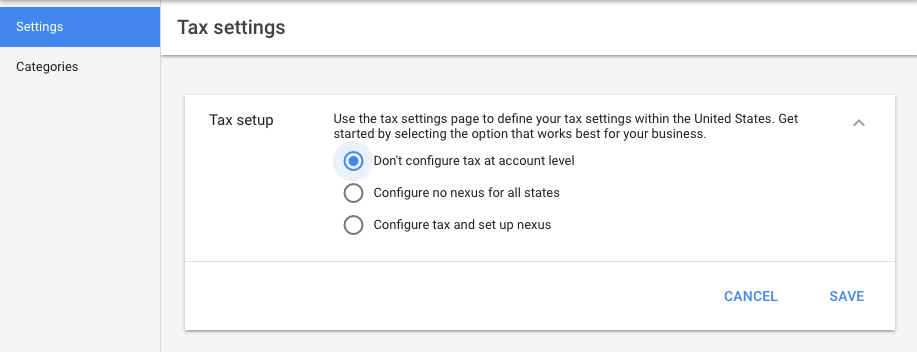
One thing you’ll want to remember is to set up your tax and shipping settings in your Google Merchant Center account. In the left-hand navigation menu, you’ll see the ‘Tax’ section. Here you’ll be able to input your desired settings:
Next you can go to ‘Shipping’ and click the blue plus sign to add a new shipping service. You will be asked to enter the service area, average delivery time, shipping rates and a minimum order value if you require one.
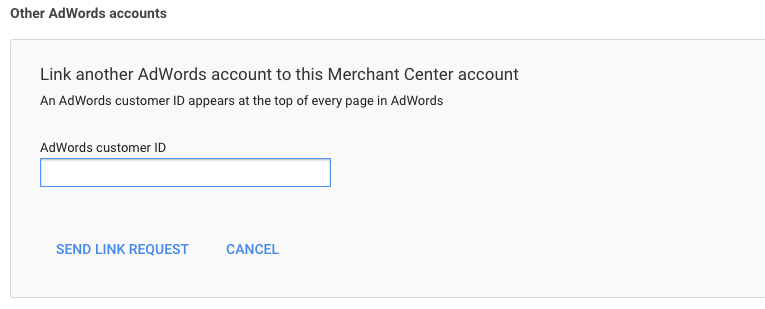
Link Your AdWords Account
Finally, in order to upload your product feed to AdWords, you’ll need to link your account.
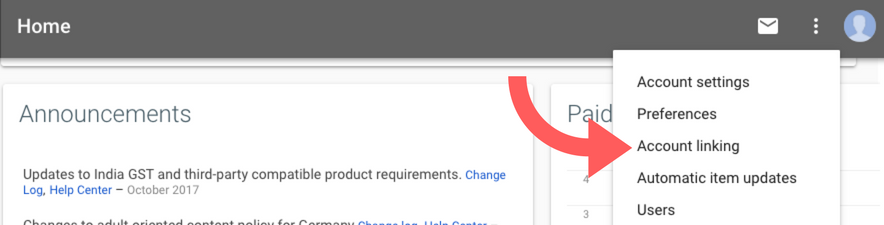
If you used the same email address to set up your AdWords account you may already see the option to link the account; if so, simply click ‘Link Account’. If not, you’ll just need to enter your AdWords Customer ID in order to link your account.
And that’s it, you just uploaded your first product feed to Google Merchant Center! Our next post will go over how to upload this feed to your AdWords account.
Don’t miss out on any of our posts, subscribe today!
Google Shopping Series: